Sunday, September 30, 2007

SNAKE!!!!


Look What My Sweet Girls brought home!!! Where is my dirt lovin little boy while all this was going on you ask? Well he is scared to death of the thing! I had to make my girls and my niece put it in the woods behind our house because I was afraid they would bring it in the house without me knowing! They kept asking "can we keep it? Pleaseeeeeeee, pretty pleaseeeeee!" NO! NO! NO! I kept telling them, he has a mom someplace that is looking for him so you better let him go NOW before she find you and her baby!

I am pleased to announced that the snake is back with his family( I think) My girls let him go in the woods behind our home. So he's back safe and sound. At least he's not in my house!!!

Friday, September 28, 2007

Dive right in


That's what I love about my girls, no fear, just dive right in. Even if it is off of the kid size table into a small pool. No Fear. Don't ya just love this form, on the tip of her toes? My girls just love being in the pool all summer. These pics will make for some great layouts, when I find some time to scrap!!!!!

Wednesday, September 26, 2007

Scrapbook Obsessions Sept 2007 Mini Album


Meet Bobby.
Yes,Bobby is a blanket. And Bobby isn’t just one blanket. It’s many blankets that each have their own name and special memories. Some are not even blankets. They are doilies or pot holders. Each Bobby has it’s own place in the heart of a little girl named Keely. I’m not sure how this obsession with crocheted blankets began? These Bobbies have been acquired over the years but it all began with just one. They have become part of the family. We have one for the dinner table. One for the car. One for sleep overs. One when she sleeps in mom and dads bed. One for watching movies on the couch. We even have one that went on our vacation to Mexico! What a site to see a little girl on the beach with a blanket all wrapped up. The job of the Bobby is NOT to keep it’s owner warm but to comfort her. Keely intertwines her toes and fingers into the opening of the Bobbies and sucks her thumb. This security is unmatched by anything. The love of a Bobby is unconditional.


Meet Sam Bobby.
Sam Bobby is a Large twin size Bobby. The largest in our collection of Bobbies. It was given to Keely by Grandma Kim. Grandma received it from a neighbor who made it and her was named Sam. Keely felt we should call it Sam Bobby after its maker. And so we do. Sam Bobby is the movie watching Bobby.

Meet Soft Bobby.
Soft Bobby was the first Bobby. Soft Bobby started out as Katelyn's blanket when she was a baby. It was given to Katelyn by Nana. Keely became the new owner when she was born. She liked to cover her head when she slept, and Soft Bobby gave mom piece of mind that she would still be able to breathe with her head covered. Keely named it Soft Bobby because it is very soft. Soft Bobby is the oldest in our collection and being the oldest it has had it share of repairs. Never the less it is the most loved of all Bobbies. It is use for sleep overs and it’s been to Mexico. What other blanket can boost a passport?

Meet White Bobby.
White Bobby is the make do Bobby. When no other Bobby can be found or they are all in the laundry White Bobby will do. Its not the favorite Bobby but at least it’s a Bobby. White Bobby was a gift for Katelyn from Nana. Katelyn eagerly gave it to Keely when she was a baby.
Meet The Other Bobby.The Other Bobby is like White Bobby, a make do’er. A gift from Katelyn. Found at a garage sale, Katelyn spent her own money to buy The Other Bobby for Keely.
Meet Little Bobby Square.Little Bobby is one of many many little Bobbies that we have owned. Little Bobby Square started life out as a pot holder found at a local thrift store. Little Bobby Square is for the car and dinner table.
Meet Little Bobby Round.Little Bobby Round is a favorite for Keely because the crochet loops are so big. This Bobby is for Mom and Dad’s bed.
Bobbies that are no longer with us. Well they could blanket a whole country. All of the Bobbies that we’ve lost are Little Bobbies. They consisted of Bobbies that were Mom’s first attempt to crochet. Small coaster size Bobbies. And many many more. They were each loved dearly.

Scrapbook Obsessions Sept 2007 layouts

Here are three layouts using Sept. kit.
First one is Muddy Mess. Anyone who has a boy knows what I'm talking about... they will play in the mud for days if you let them! Cole just loves taking his cars and putting them in the mud. He's not a fan of the pool so he would take his sand bucket over to the edge and get a pail of water to make his mud pile! After it's all over I take him and his cars in for a much needed bubble bath!

Next two are school related layouts. I'm moving Katelyn's school pic over to 12x12. I soon found that I had a ton of school pic left over. And since we were not giving them away I decided to use them in multiples on the layouts. I use the same sketch for each year to make the album flow better.

Monday, September 03, 2007

Sunday, August 19, 2007

Frances Meyer Acrylic Album


Here is an acrylic album I made from the Frances Meyers Travel Kit South Pacific. I cut the acrylic myself! **HINT** If you are making your own album most home improvement stores will cut the acrylic for you. **HINT** To smooth the edges of the acrylic use a flame to melt the edges. BE CAREFUL THE ACRYLIC MELTS AND IS HOT only heat it enough to slightly melt the edges!

Scrapbook Obsessions September 2007 Kit

If you haven't already you should check out Scrapbook Obsession's Kit for September!! It has the new Basic Grey Recess Line! There are still a few left so pop over and make sure you get yours!


September 2007 Kit
*Basic Grey Recess Patterned Paper (18 sheets)
*Rusty Pickle Corrugated Alphabet
*Rutsy Pickle Abstract File Folder
*7gypsies Zanaibar Gaffer Tape (our choice)
*7gypsies Notebook Stickers
*Scenic Route Office Arrows
*The Crafters Workshop Doodle Flower Template
*Daisy D's Snapshot Rub Ons
*Marvy Pigmented Artist Pen - Black

Thursday, August 09, 2007

Scrapbook Obsessions August 2007 Kit Altered Items

Acrylic Coaster Album
Who would believe you could make an album from furniture coasters? Well.... everyone would. I have seen some very creative artist make some very creative and inspiring things! I just happened to find these coaster in our garage and decided they were destined to be an album.


You can find these in square and circle shapes and many different sizes. The ones I used are 2 1/2 x 2 1/2 inches.


Supplies

Prima Just us paper Togetherness, Secrets, Enjoying You, Exchanged Glances, Shared Giggles, Quiet Contentment, Loving You, Long Embrace.
Making Memories Classically defined Moments stickers
Rusty Pickle Rustic trim
Making Memories jelly labels love 1
EK success simply classic frosted tags
Rub ons- Fancy pants,Dapper dude, Gin X Maggie white, , 7 gypsies Hudson valley, upsy daisy designs little man & little lady seals, Creative imaginations swatch book memories, Creative imaginations loved ones designs, Creative imaginations family memories and youth.
Stampin up clear button
Bitty bag flowers by Prima
American crafts green house felt flowers
colorbox charcoal ink
making memories round tag
American crafts green pen
unknown - buttons

1. drill holes in acrylic FIRST.
2. Cut all pattern paper and add embellishments BEFORE you glue them to coasters. GLUE LAST.
3. Add rub ons along sides of acrylic. Making sure to overlap and burnish them down so they won't peel off.
4. Glue all embellished pages to acrylic.
5. Punch holes in paper.
6. Add ribbon. string tags and other embellishments onto ribbon.


Heart Box


Supplies

Bazzill cardstock blackbird
Prima pattern papers - loving you (back side), quiet contentment
Rusty Pickle rustic trim7 gypsies gaffer tape black with vine
Junkitz newspaper flower
Cosmo Cricket buck naked buttons and more (heart)
Box Victoria's Secret


1. cut pattern paper to fit over top. Let edges show.
2. trim sides in blackbird cardstock.
3. layer gaffer tape around the box. over cardstock.
4. remove button from newspaper flower and adhere to top of box.
5. add quiet contentment paper to chipboard heart. sand edges.
6. Add trim to heart. glue heart to newspaper flower.


Altered Check Book


Supplies
Prima pattern papers long embrace, enjoying you
Making Memories classically defined cardstock stickers memories


1. Cut long embrace paper using calendar as the template.
2. Using exacto knife cut flower from enjoying you paper.
3. Adhere to long embrace paper. Some may over hang the edge. (trim before placing inside cover)
4. Trim cardstock sticker (discover) and place along left edge of long embrace paper

Scrapbook Obsessions August 2007 Kit Layouts

Aunts

Supplies:
Prima pattern papers -shared giggles, loving you flowers bling
Rusty Pickle rustic trim
Making Memories classically defined cardstock stickers memories (family)kraft mono alphabet mini eyelets teal eyelets brown
Bazzill bazzill wings bitty blossoms hazard, brown buttons
American Crafts felt flowers greenhouse
Li'l davis journaling stamp
Color box ink chestnut roan
unknown - buttons, orange pen

1. Cut loving you paper to 10 1/2 x 10 1/2 inches. Adhere to center of shared giggles paper.
2.. Add Rusty Pickle Trim to edge of loving you pattern paper.
3. Place two 4 x 6 photos on paper.
4. Add letters to bottom edge of paper and outline with pen.
5. Use eyelets for center of flowers and buttons. (use glue to add eyelets to the buttons)
6. Place flowers from bottom left corner upwards over photos to upper right corner.
7. Use journaling stamp to stamp on pattern paper. Add journaling.
8. Add family sticker to top right corner.

Thirst


Supplies
Prima pattern paper- Secrets, Togetherness
Bazzill cardstock Maraschino
7 gypsies black gaffer tape (dot)
Making memories rub on images tags Chipboard
Around the block transfer tape red ruler
Heidi swapp raw chipboard letters
Red paint
black zig pen
white paint pen
colorbox charcoal ink

1. Cut Togetherness paper 9 x 9 1/
2. Adhere to chipboard.
3. Cut Secrets paper 2 x 12. place over top edge of togetherness paper.
4. Add photo over secrets paper.
5. Cut title from red cardstock. Outline with white paint pen and black pen. Place on layout and overlapping photo.
6. Paint and ink raw chipboard letters and place on top rt corner.
7. Place gaffer tape along bottom overlapping photo. And along top edge.
8. Use around the block transfer runner to add ruler around togetherness paper.
9. Distress with black ink and red paint.
10. Add rub on tag. Journal.

enjoy


Supplies
Prima Long embrace pattern paper
Creative Imaginations Elmer Bookbinding tape
Making Memories classically defined Moments stickers
Heidi Swapp stamp (enjoy)Pure and flourish stamps from last months kit
7 gypsies bureau sitckers
Bazzill orange and teal cardstockteal
acrylic paint
colorbox chestnut roan ink
white paint pen
teal zig pen

1. Distress orange cardstock along all edges.
2. Draw design on back of orange cardstock. Use different size hole punchers to for design.
3. Layer teal cardstock under orange so that it shows through the punch outs.
4. Use paint and ink to distress edges of cardstock.5. With teal paint stamp title on orange cardstock. Outline with teal pen.
6. Cut long embrace paper and distress one edge. Place on a slant.
7. Stamp on gaffer tape and add along bottom edge of pattern paper.
8. Add photos over pattern paper.
9. Journal on round journaling sticker
10. Add "memories" sticker to bottom corner and distress with teal paint.


Wednesday, August 01, 2007

I have an Etsy Store!!

I've been busy over the last few days setting up my very own Etsy Store! I'm still adding items every few days. I would like to have more of my sewing and embroidery items. Check out my funky button rings! I'm also selling some of my altered items. I've run out of room to show them off. I think they need to be displayed and or used! Stop by and pick up a few things.

I'll be adding my August Scrapbook Obsessions Kit Creations over the next few days. I've made an album from furniture coasters. You'll want to see this one! Simply beautiful! I love it and know you will too. I'll be posting how to directions so you can make your own.

Friday, July 27, 2007

Cleaning out my supplies

Okay here are some things I CAN live with out. Only because I have extras that I kept. I am trying to clean out AND declutter.
I've been cleaning out my scraproom and found lots of things I've never used! They have to go!!! Prices do not include shipping. I will accept Pay Pal payments. Email me at posch@netzero.net if you have questions, to find out shipping amount or want to buy something.
Thanks:)

Donna Downey books. I love these three books, but I got a second set as a gift.

NEW Photo Decor $10
NEW Decorative Journals $10

NEW Military Moments book $10

NEW Digital Quick Pages by Ali Edwards CD $10

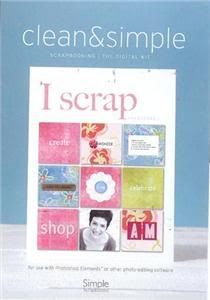
NEW Clean & simple CD $10


Sizzix New $40


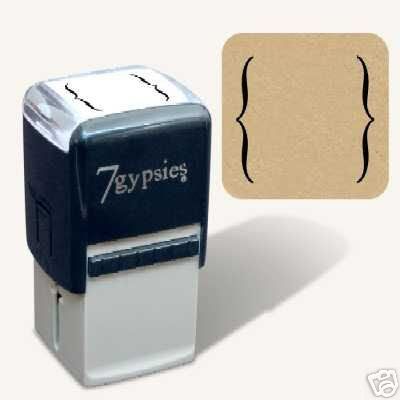
7 Gypsies Parenthesis stamp $5


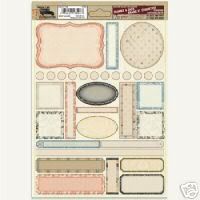
7 Gypsies Frames & Tags Hudson Valley collection $1.50


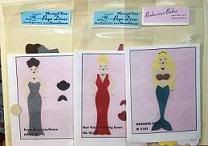
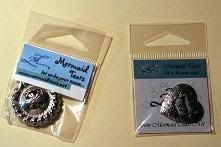
Mermaid Tears Bodacious Babes Set of 3 $5


Mermaid Tears ribbon slides 3 circles and 2 hearts $2 for all 5


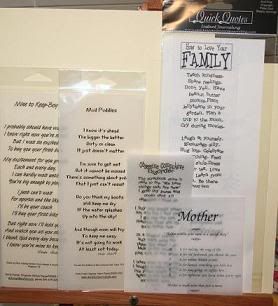
Quick Quotes set of 6. Mud puddles, Mine to keep boy, Mother, Family, Obsessive compulsive (2 of these) $3

Thursday, July 26, 2007

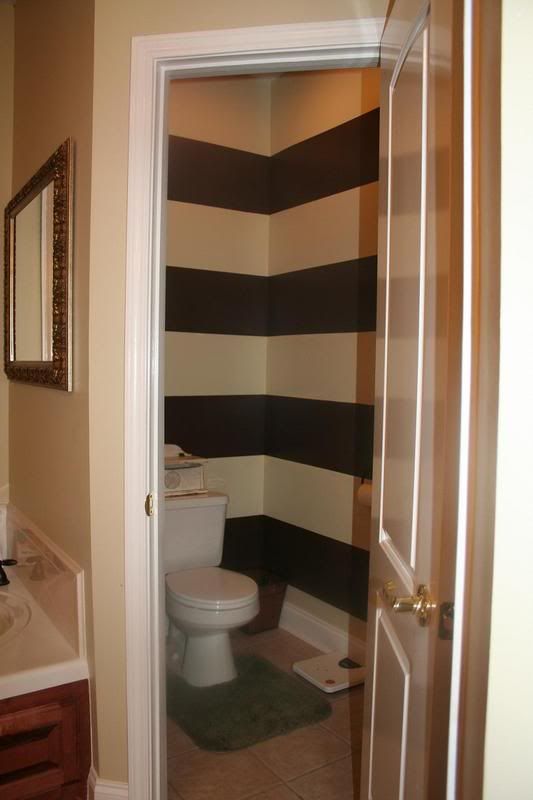
Horizontal stripes

I just love them how about you? I loved them so much that I painted horizontal stripes in my water closet (the room with the toilet).
Now to do some decorating in the master bath!

Portion Control

I know we all have a problem with portion control. But today I think that someone took it a bit to far. I live in the South, it's hot here! And everyone loves a nice cold chocolate ice cream cone. Right? And yes, sometimes I do make the scoops a bit larger than they should be. Not today! Take a look at what I mean.


Step One put kids down for a nap. (thinking about ice cream)


Step Two get supplies to make ice cream (thinking about ice cream)


Scoop. check


Ice cream. check


Cones. check


Ready!


Step Three open cones and take one out.... What the heck! who shrunk the cones?


Step Four read box carefully.... "kids cones" WHAT??? That's what happens when you take 3 kids to grocery store with you. In the craziness of three kids, ALL telling me, at once, what they HAD to have, I picked up KID SIZE cones. Great, now I have to make three mini cones just to get one normal size cone. Which translates to I have to get up between cones to make another! Who thought these kid size cones were a good idea? And where do you find a scoop to fill them anyway? Craziness I tell you! I felt like a giant eating an tiny cone!


When the kids got up from nap and had a cone they laugh at them too!

Thursday, July 19, 2007

"Sew" much fun!

Guess what I've been up to... Sewing!

Christmas Gifts! What? Christmas in July? Yep that's what I've been working on Christmas gifts! With lots of little people to shop for this Christmas season, I wanted to find something that the kids AND parents would love. There are only so may toys you can buy a kid. And it seems mine have them all! I think I found something that everyone in the family will just love. Well... at least my little Keely did. Its a nap mat! (lets hope this will encourage her to take a nap!) It only took about 2 hours to make start to finish. I didn't have a pattern and if I did it probably still would have taken me that long! I found some that look similar on ebay but they were $100 +.... yep you read that correctly! Now a good bit of love and time went into this mat but I needed 7 of them. And dishing out over $700 for Christmas gifts for 7 kiddo's wasn't in the budget this year so I improvised and made my own. The fabric came from a little fabric store located in a quaint little town, Fayettville, TN. Its the kind of southern town that everyone knows everyone else. Lots of little shops to peek into around the town square. I even had lunch in the OLD jail. It had been renovated and turned into a restaurant. You could have lunch in one of the old cells. Very interesting and lunch was great too! Back to the store... The name of the store is Sirs Fabric. And I must say well worth the hour drive for me. The fabric is decorator quality fabric and the price.... well lets just say the MOST expensive was $3.99 a yard! We're talking 54 inch decorator fabric at that. I didn't know when I bought the fabric that I was making these nap mats or I would have bought a TON more. My sister in law and I originally went to get fabric to make a diaper bag. But I couldn't leave without some of the most yummy fabrics I've ever seen! Who could? Well certainly not me! Take a look at what I brought home.

.

Now I just have to go back and pick up some more boy friendly fabrics for three of the nap mats and of course I MUST stock up on some other girly girl fabrics. Right? Who knows when you need them!

Here is the finished project. Perfectly girly with my little sweeties name on it and a ribbon strap to carry it to those sleepovers.

All rolled up


Open view


I'm thinking I need to sell these. With school starting back soon, I'm sure they'd be a hit for any Kindergartner! **note to self** look into making some extras to sell.


Scrapbooking.... well I was able to work on a few things this week. My kit from Scrapbook Obsessions was packed FULL of delightful play things this month. I worked on a layout, an altered box and Creative Imaginations Alterable check book/Calendar cover. I've also been working on a few projects for the Frances Meyer Design Team. Two of my projects were selected for AC Moore Stores. Look for them in September at your local AC Moore! And make sure you pop over and check out Glitz Designs new web site. Lots of GREAT eye candy over there!

Wednesday, July 18, 2007

Extreme

Here's my layout for the Scrapping with Grace Big Scrapper round 4. The theme was Extreme. And we could only use one photo on the layout. The journaling is under the photo, just lift the tab. And here's a little trick I learned from my friend Lynnise. Use a small square punch to make holes along the edge of your paper then tear the edges to look like torn paper. If you try this make sure you post a link. I would love to see what you've created.
Extreme Mom